Background:
The Polybase feature was first introduced in SQL Server 2016. The data virtualization solution enabling customers to query data in Cloudera or Hortonworks from SQL Server via a Java interop layer.
In 2018, Oracle made the surprising and controversial decision to change it’s support and licensing model for Java. See Oracle’s FAQ for details.
So, starting with SQL Server 2019, Microsoft partnered with Azul Systems to provide an Enterprise distribution of Java for free with free support.
Changes to Polybase Installation Process:
When installing a new instance of SQL 2019 or adding the Polybase feature to an existing installation of SQL 2019 you will go through the installation wizard until you get to this page:

As you can see, you’re now prompted to either Install Open JRE 11.0.3 included with this installation (default). Or to specify the location of your other JRE/JDK installation.
Problem:
Let’s suppose that you installed SQL 2016 with Polybase, had installed and ran on Oracle JRE 8 but after Oracle’s 2018 announcement decided that you needed to upgrade to SQL 2019 and switch to using Azul Open JRE. You’ve already uninstalled Oracle JRE but when you go to upgrade to SQL 2019 there is no option for selecting a different JRE version. What do you do?
Solution:
Before you start the upgrade to SQL 2016, make sure that you uninstall Java JRE 8 from the server. You can do this easily through the regular add/remove programs:

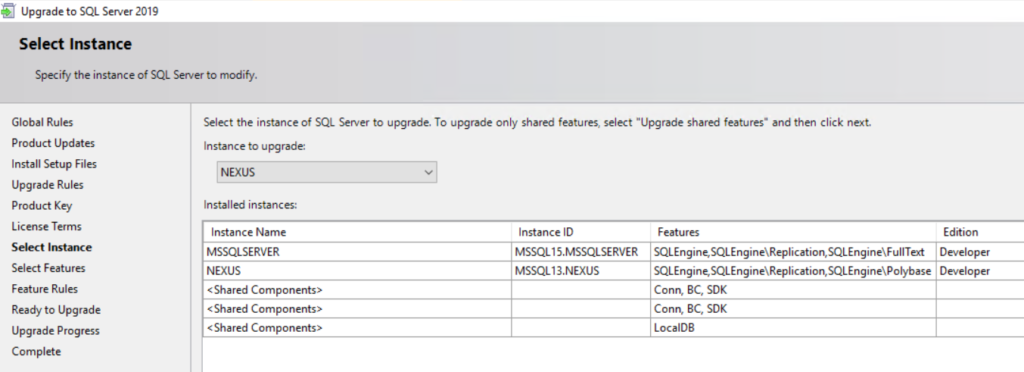
Next go ahead and launch the SQL 2019 installation media and proceed as normal through the Upgrade wizard:

Select your instance and continue:

While going through the wizard, you will notice the absence of any option to specify the JRE version or path. That’s ok and what you should expect to see.
Continue through the upgrade wizard to completion.
After the installation completes check the registry at: Computer\HKEY_LOCAL_MACHINE\SOFTWARE\Microsoft\Microsoft SQL Server\MSSQL15.MSSQLSERVER\Polybase\Configuration

The JavaInstalledLocation key should not be present. If it is present that means that you forgot to uninstall the Oracle Java JRE. If you did, that’s ok just go ahead and uninstall it now then check the registry key again after rebooting.
If the key is still present after rebooting then go ahead and delete it.
Finally, relaunch the SQL 2019 Installation Center and select add features to an existing installation:

On the “Installation Type” step of the wizard, select the instance with Polybase that you just upgraded to SQL 2019.

On the next step of the wizard Feature Selection, scroll down and you should see the PolyBase Query Service for External Data box is already checked and greyed out. But there is a new box nested underneath labeled Java connector for HDFS data sources:

Check this box and click next.
On the next screen you will now have the option to Install Open JRE 11.0.9.2 (default) or to Provide the location of a different version that has been installed on this computer.

Complete the rest of the steps of the installation and it should install successfully.

To verify that the desired Java JRE is being used by SQL Server Polybase, open up the registry again and navigate to: Computer\HKEY_LOCAL_MACHINE\SOFTWARE\Microsoft\Microsoft SQL Server\MSSQL15.NEXUS\Polybase\Configuration
You should now see the JavaInstalledLocation key:

If you click modify you should see that the value is the path of the Java installation you selected or if using Azul JRE, something like this:
C:\Program Files\Microsoft SQL Server\MSSQL15.NEXUS\AZUL-OpenJDK-JRE

I personally tested these steps on SQL Server 2016 but the same steps should work on an upgrade from SQL 2017 to 2019.